After few years of usage, car's doors move freely and came back automatically mostly if you parked car on slope, and sometimes it hits on your legs which actually hurts.
In my case I have Civic 2005 and its all 4 doors are slamming, and usually come back on legs if I parked on my driveway(as its slope).
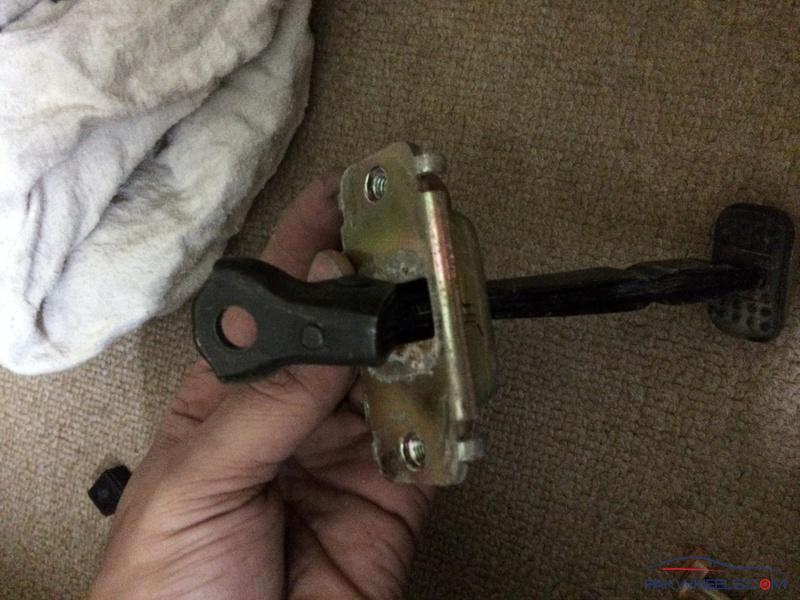
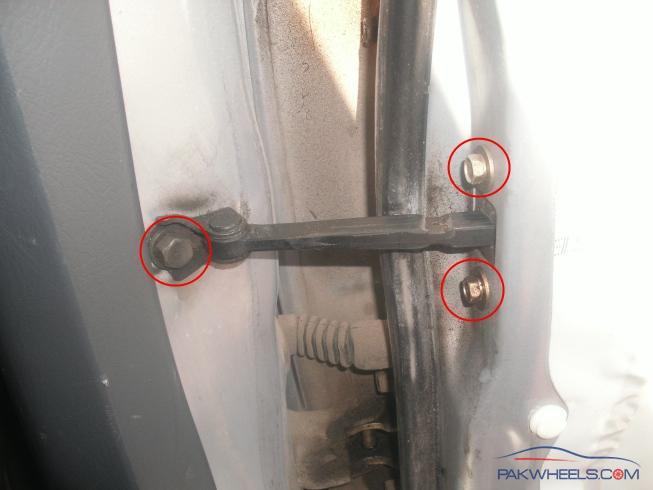
There is one thing in car doors between 2 hinges called "Check" (You can see in photo above). Its cost for new is around 1500/door for civic at-least.
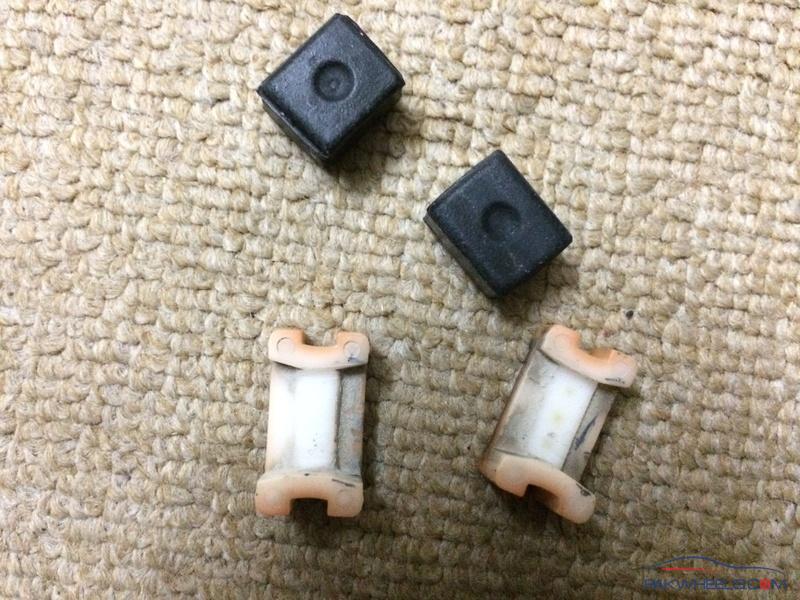
Mainly their is plastic stoppers which grip the checker rod, and there is rubber behind the plastic stoppers which apply pressure on it. In some cars(like civic 96-00) there is steel rollers in it(instead plastic stoppers) but main functionality is same.
In case of plastic stoppers there is small bump on it which actually stops the door to going back freely and after running few years(around 8-10) its bump gets flat (not completely flat but mostly half), So main thing I am going to do is to use remaining half bump.
First thing, make sure you've removed the door panel. Once that's done, remove the three bolts holding the door checker in place (one screw fix it to the body and 2 screws fix the checker to the door).
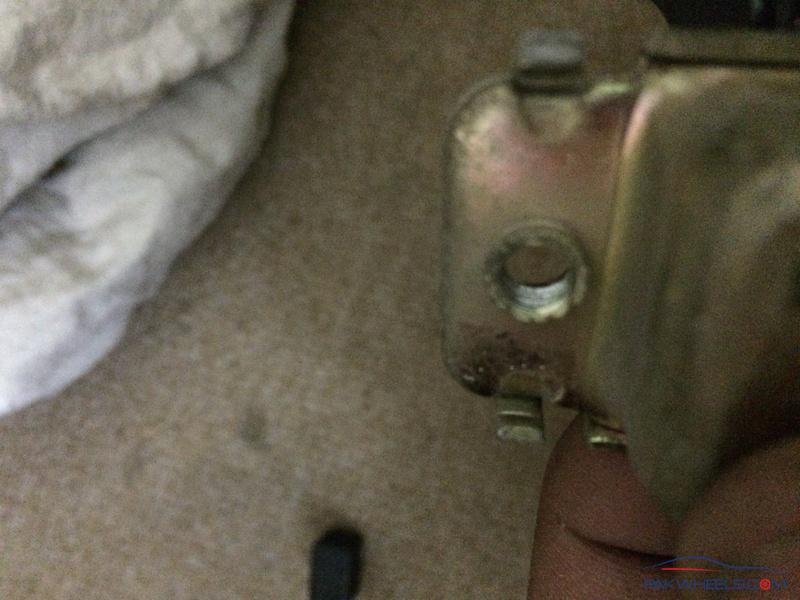
The door checker can only be pulled out through the inside of the door. So reach inside the door with one hand and pull it out.
Now here comes the tricky phase here you have to actually open the checker and do some tweaking. (H)
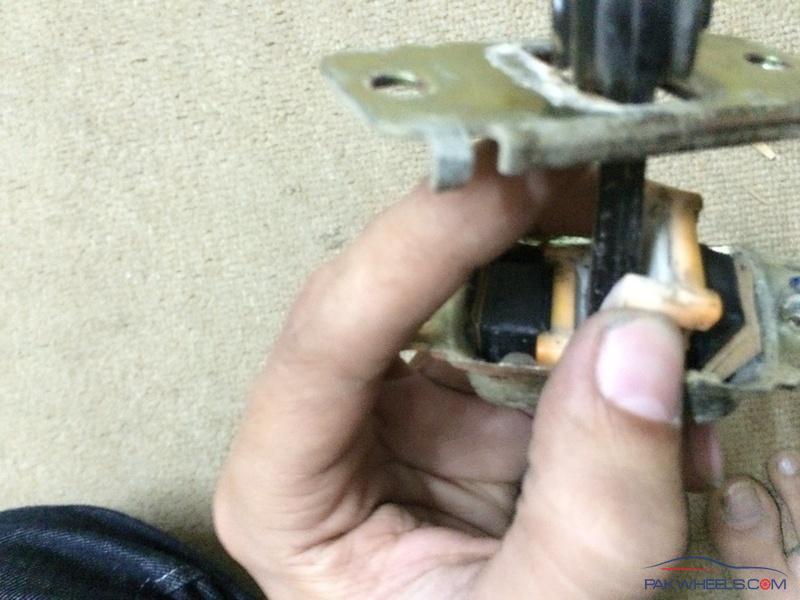
You'll see the the checker moves back and forth on the rod. That piece/checker is supposed to exert significant pressure on the bar/rod, so that when it falls over the grooves, it grabs on and holds the door in place. What you'll likely find after taking it off is that you can slide it back and forth, over the grooves, with relative ease and little resistance. That's Bad. (It should be very hard to move).
So let's open that bad boy up. Slide the big part (the part that slides) over to the slim side of the bar so it's easier to work with. There's a plate with little tabs on each corner holding this thing together. Un-Fold those tabs up with pliers. You can use a flat-head screwdriver too, but that's dangerous; trust me. They can slip off easily and stab you in the hand. Not fun.
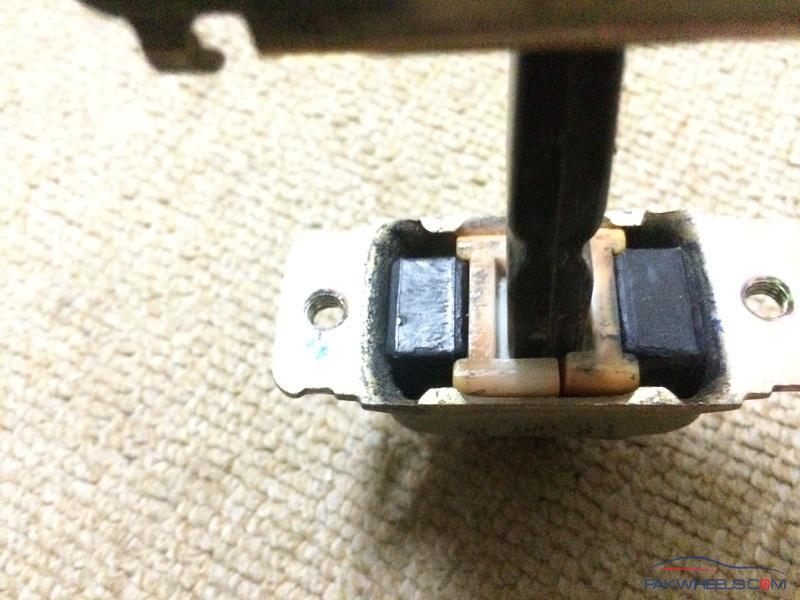
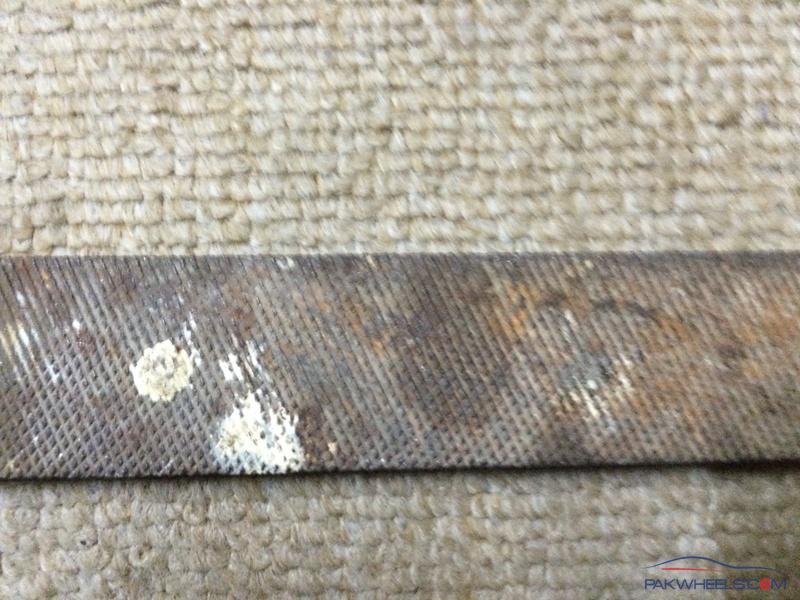
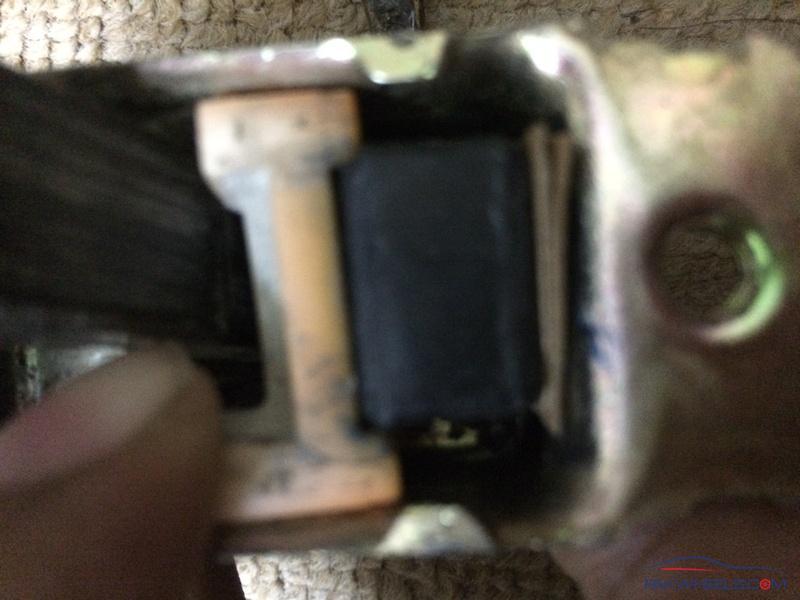
Once you've got it opened, pop out the insides. This is what you'll see: two plastic H-shaped pieces with two rubber blocks that put pressure on them. Now those two plastic pieces are supposed to have a bump on the inside of them to fit into the grooves on the bar, but as you'll likely notice, they're flat now.
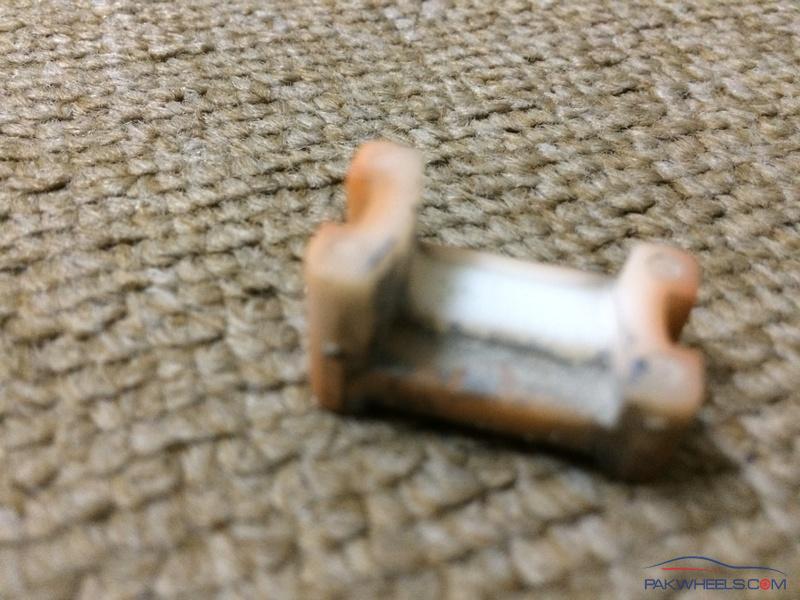
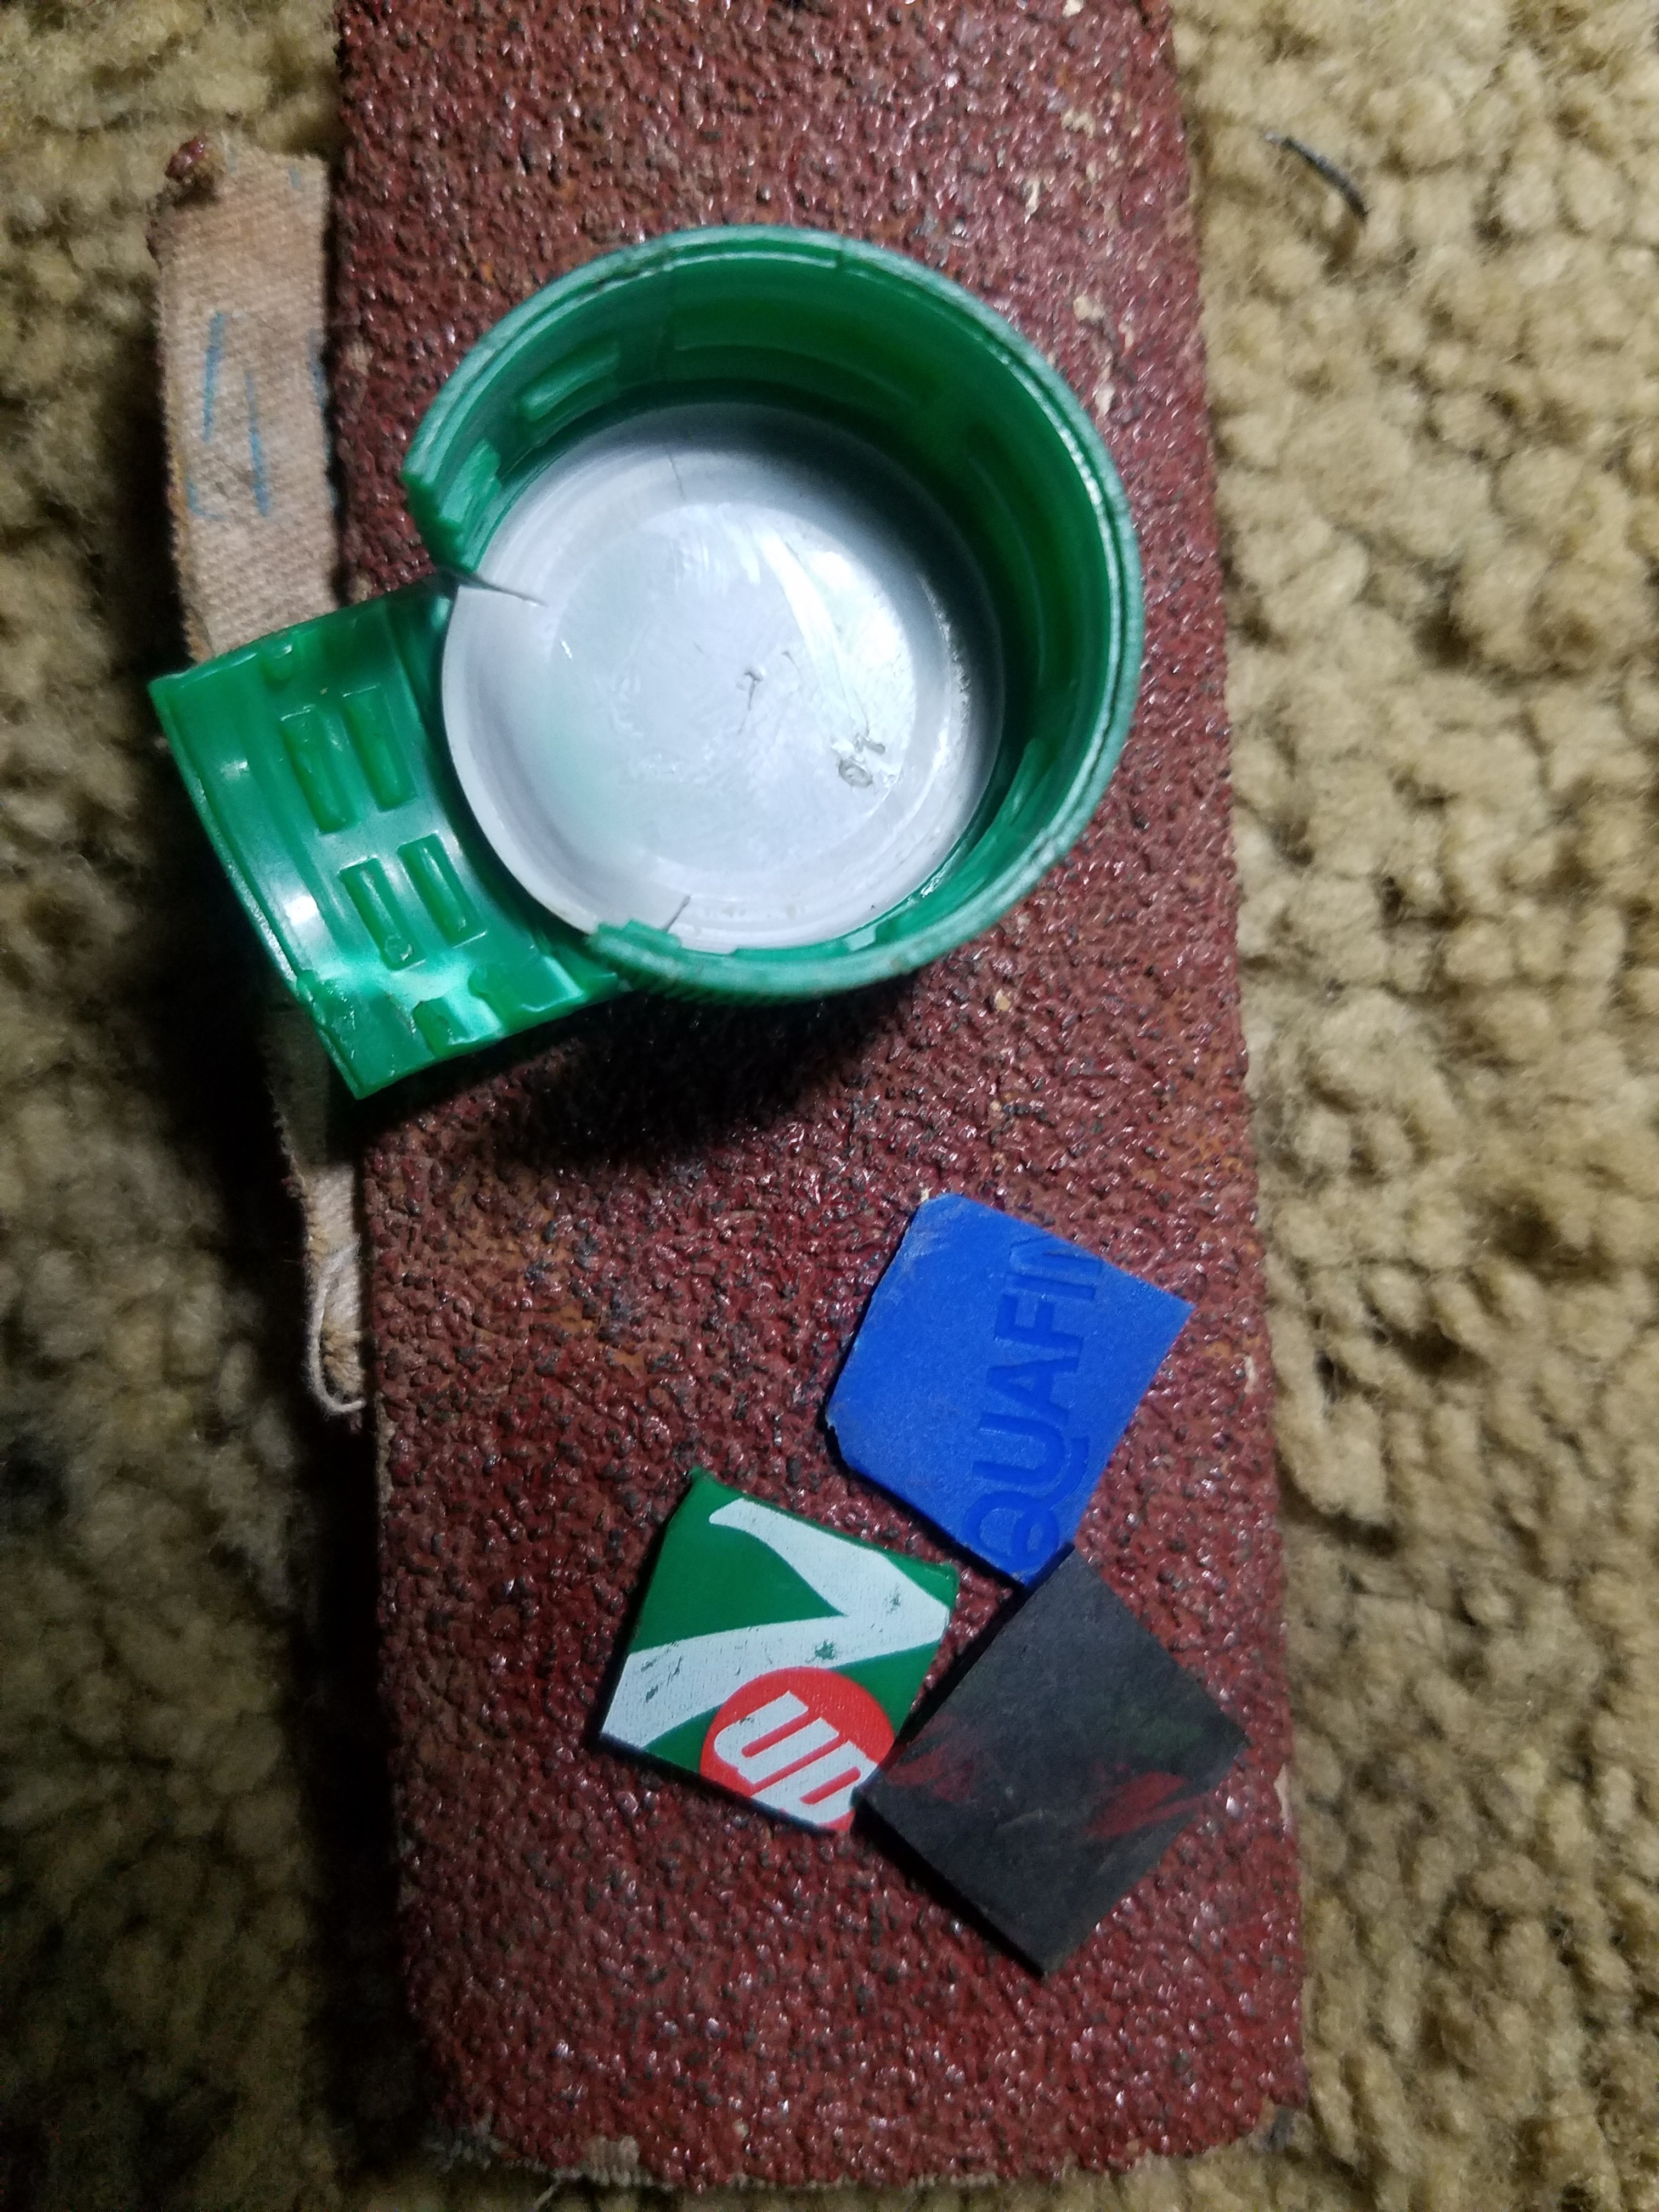
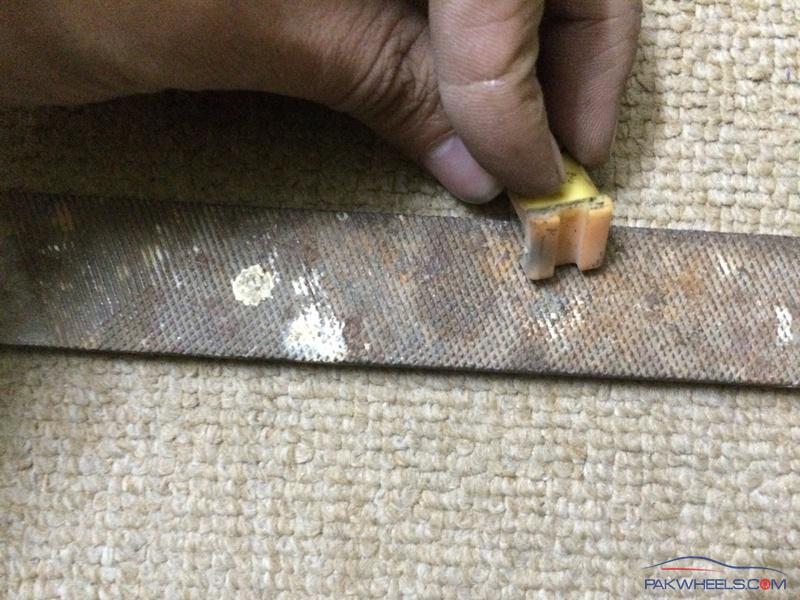
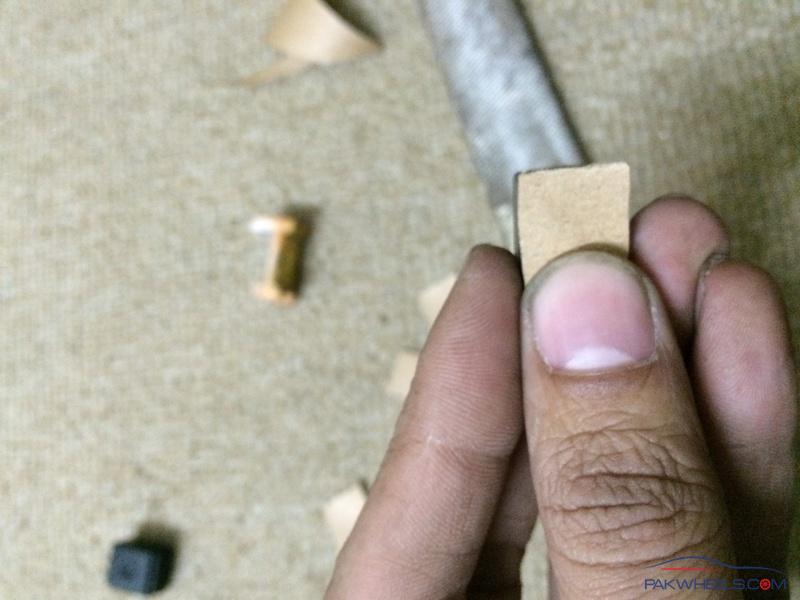
However the plastic pieces are small enough to fit into the grooves themselves. But because of the H-shape, the two pieces can't get any closer to each other. So sand them down. The picture shows which part to sand.
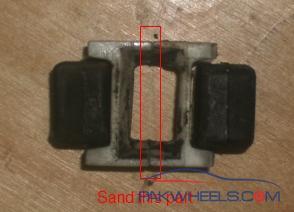
You don't have to worry about sanding too much since you really don't want those parts touching anymore. The picture below will show how the pieces fit over one of the grooves after I sanded them down.
Now because we're pushing them closer together than they were before, the rubber blocks will be too small. So we need to put something else in there. I used cardboard. I cut small pieces, about the same size as the blocks. Depending on the thickness of the cardboard, you'll need to use one or two pieces on each side.
I won't lie to you: stuffing the plastic, rubber and cardboard back into the thing is the hardest part. If you're finding it hard, that means you're doing it right; it needs to be tight! A flat-head screw driver came in handy for me. Keep the casing down near the narrow end of the bar to make it easier to shove everything in.
Once you have everything in, put the plate back over top, but don't fold the tabs over yet. Slide it back and forth across the bar first, holding the plate firmly over the rubber and plastic so they don't fall out. You should find it extremely difficult to move it past the grooves. In fact, it should either take all of your might to do it, or if you can't move it out of the groove at all, even better. I'm serious about it taking everything you have to move it. That's important. If that's not the case for you, shove some more cardboard in there. Otherwise it'll still be too loose once you put it back on the door.
Once the tension is acceptable, fold the tabs back into place with pliers again. Now you're ready to go! Put it back in place through the inside of the door, and open your door wide and watch it stay! You may want to grease up the bar again. The grease will help the door slide shut when you push it shut.
Hope it will help you in fixing your car's door checker yourself, Stay blessed 
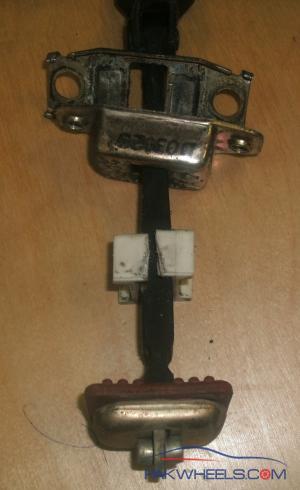
P.S. I am attaching more photos below which will help you in see how to re assemble the checker and fix it back in door.