Sharing a simple DIY job I did at home in a 2nd gen Fortuner Diesel. After the recent experience at a Toyota Dealership, I decided to take the matter into my own hands. It seemed either most service shops are not aware of this routine preventive maintenance, or simply use one generic MP grease to lube all grease points.
Hope this humble DIY serves as a guideline and a reference thread to many Fortuner, Hilux, Prado, FJ Cruiser, and Land Cruiser users alike. This virtually applies to all 4X4 SUVs by Toyota.
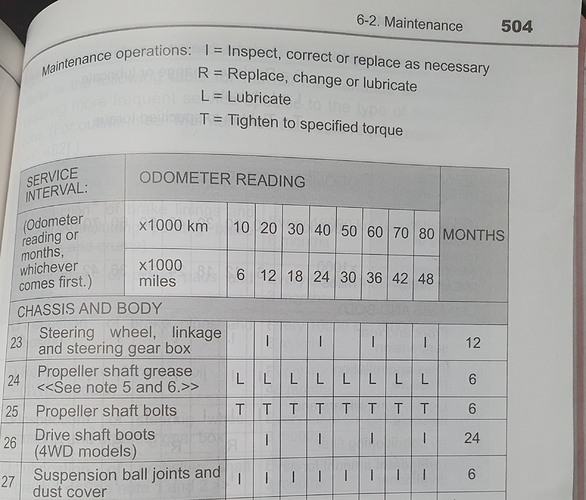
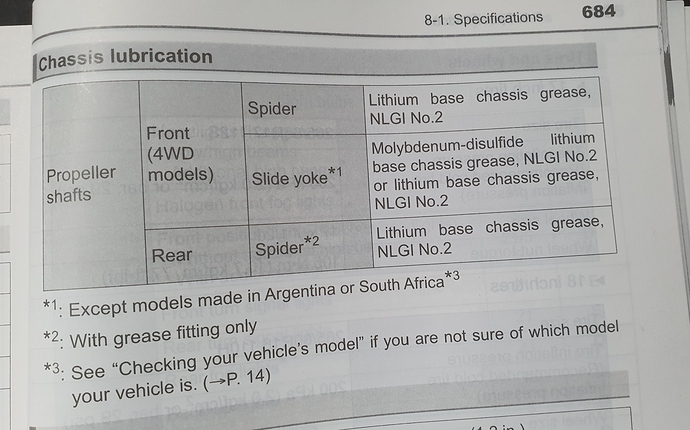
Before we begin, let's see what the Owner's Manual recommends:
So to summarize:
-The propeller shafts need to be lubricated every 10,000 km or 6 months, whichever comes first. Practically every oil change interval
-Front propeller shaft comprises spider joints and a slip yoke.
-Rear propeller shaft comprises of spider joints only. In 2WD models, there is only a rear prop shaft.
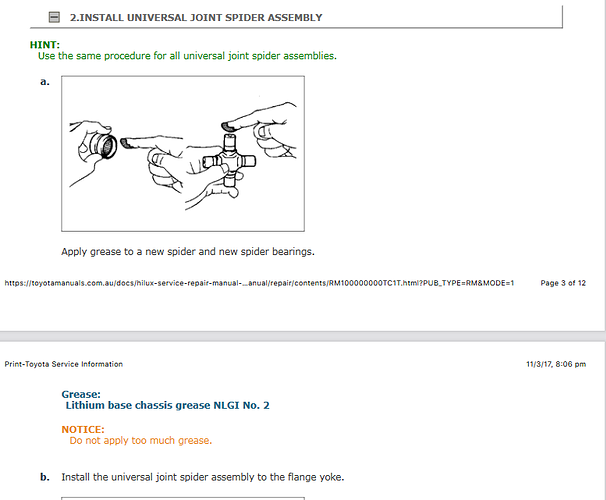
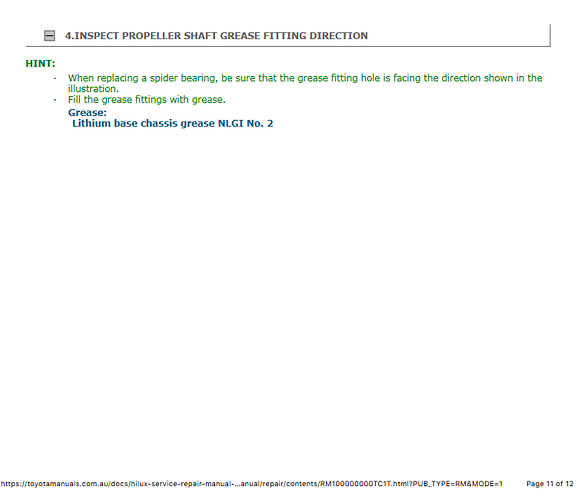
-Lithium base chassis grease NLGI 2 for Spider joints
-Moly-fortified (Mos2) Lithium base chassis grease NLGI 2, OR Lithium base Chassis grease NLGI 2 (same as above) for the Slip- Yoke.
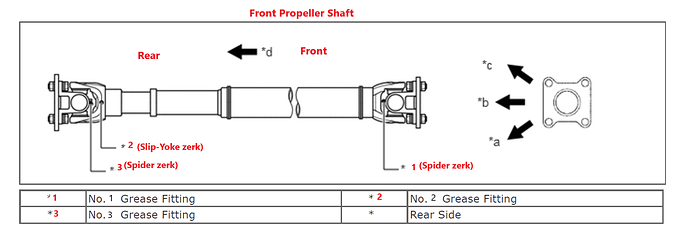
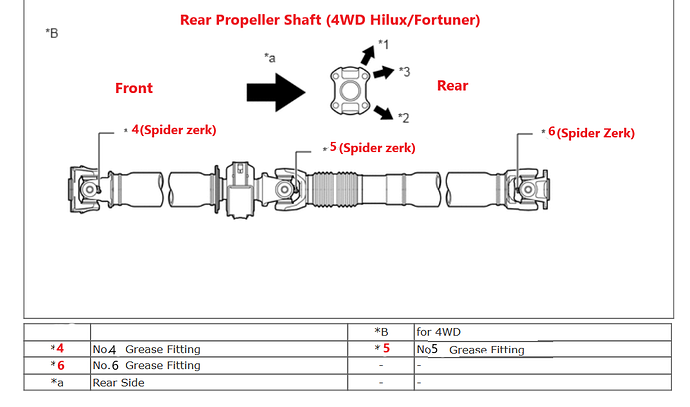
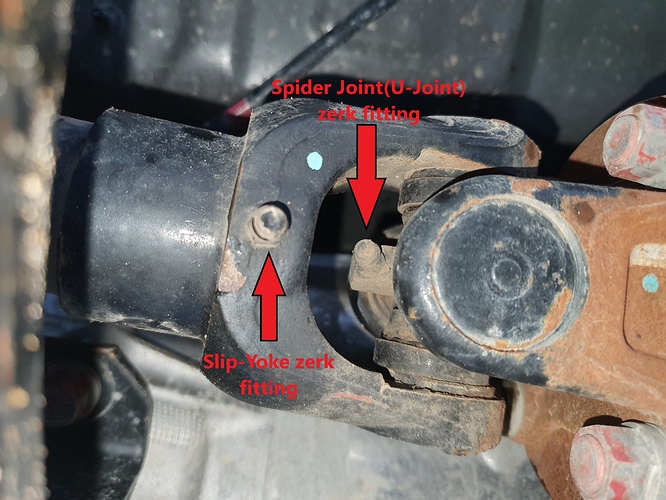
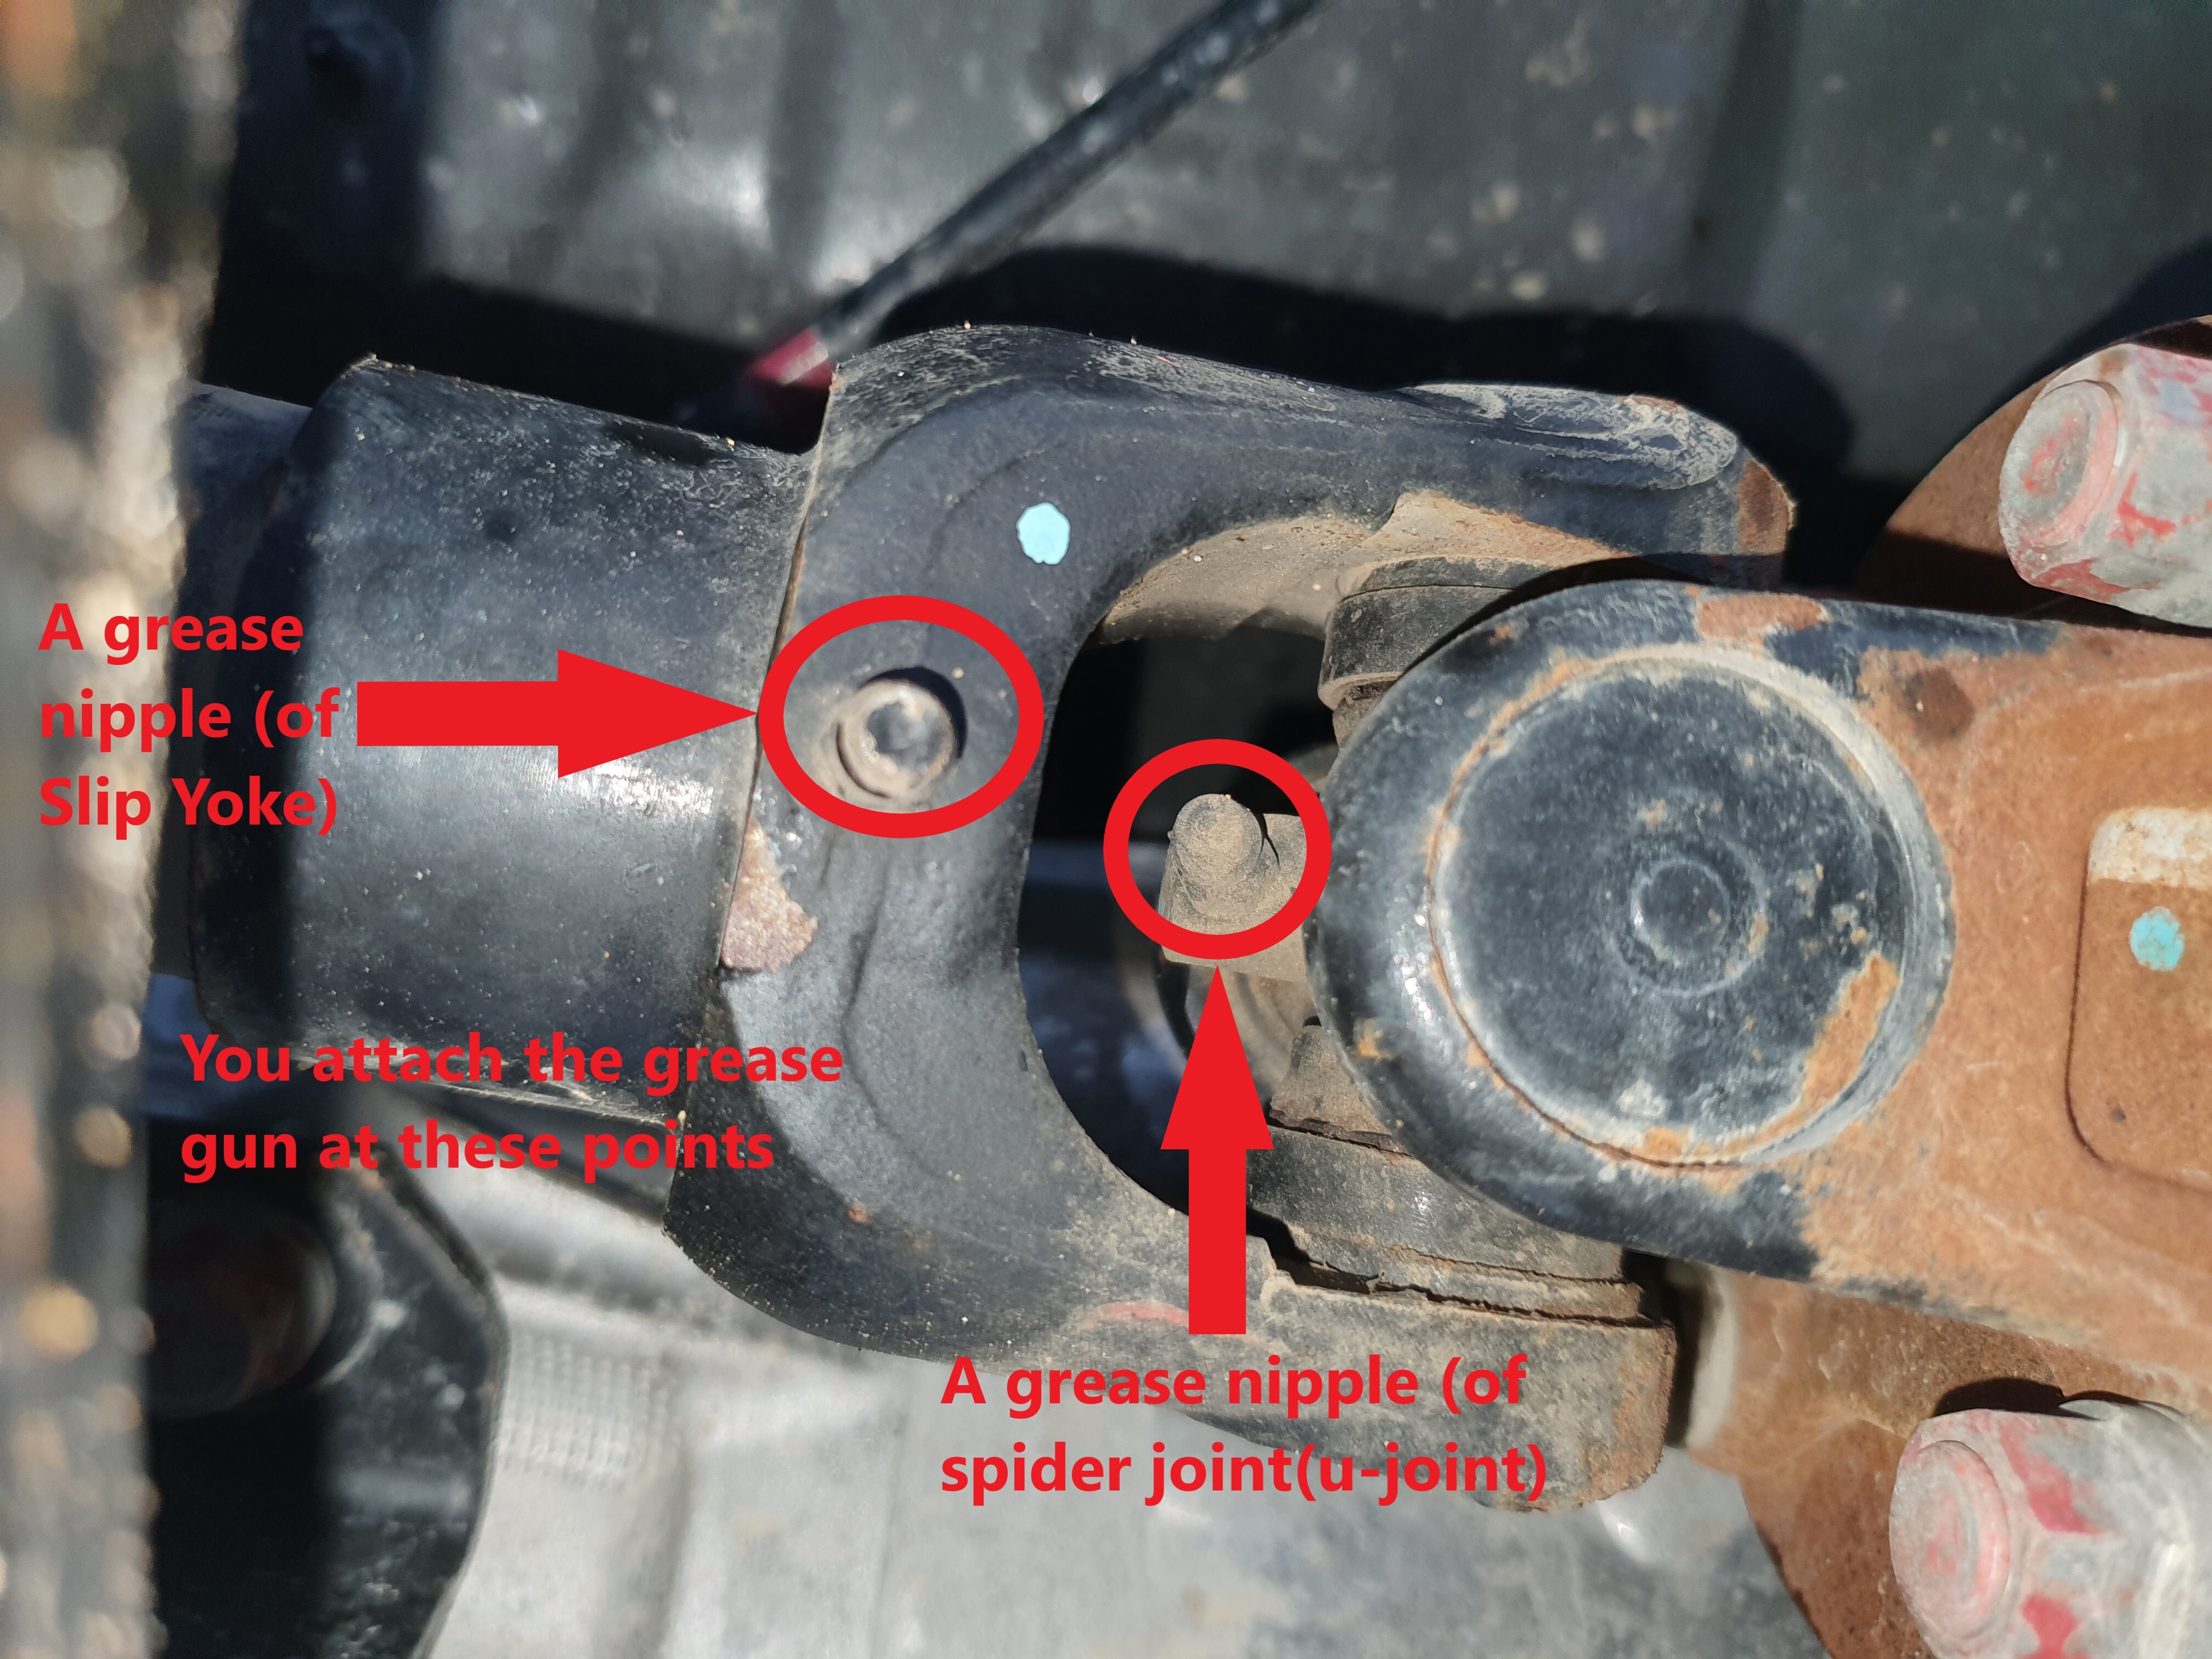
A few cutouts from the Toyota Factory Service Manual:
As you can see above, the text marked in RED is my annotation on the images. For ease of understanding, I have marked the grease fittings from front to rear. You can count a total of 6 fittings.
How to grease the Joints?
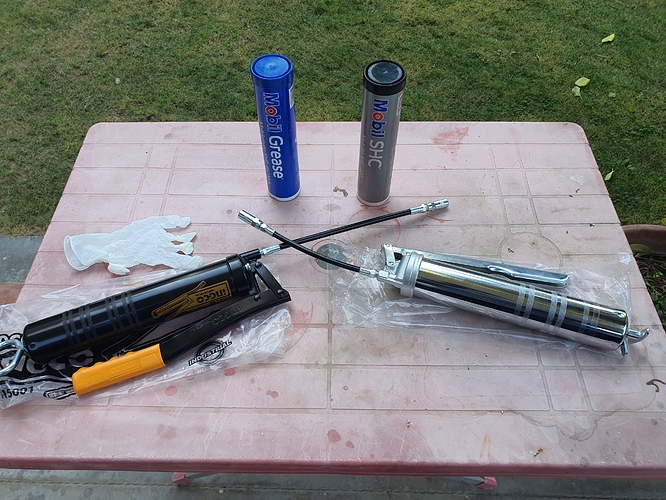
In order to do that, you will need the following tools at your disposal:
1. Two separate grease guns. Although if you use only one type of grease, then only one grease gun is needed.
2. Grease
3. A pair of disposable gloves
4. Some paper towels or a dirty rag to clean the grease.
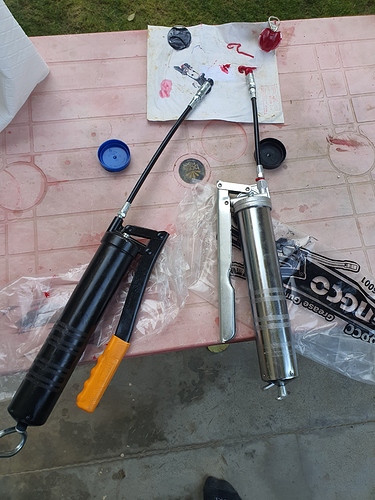
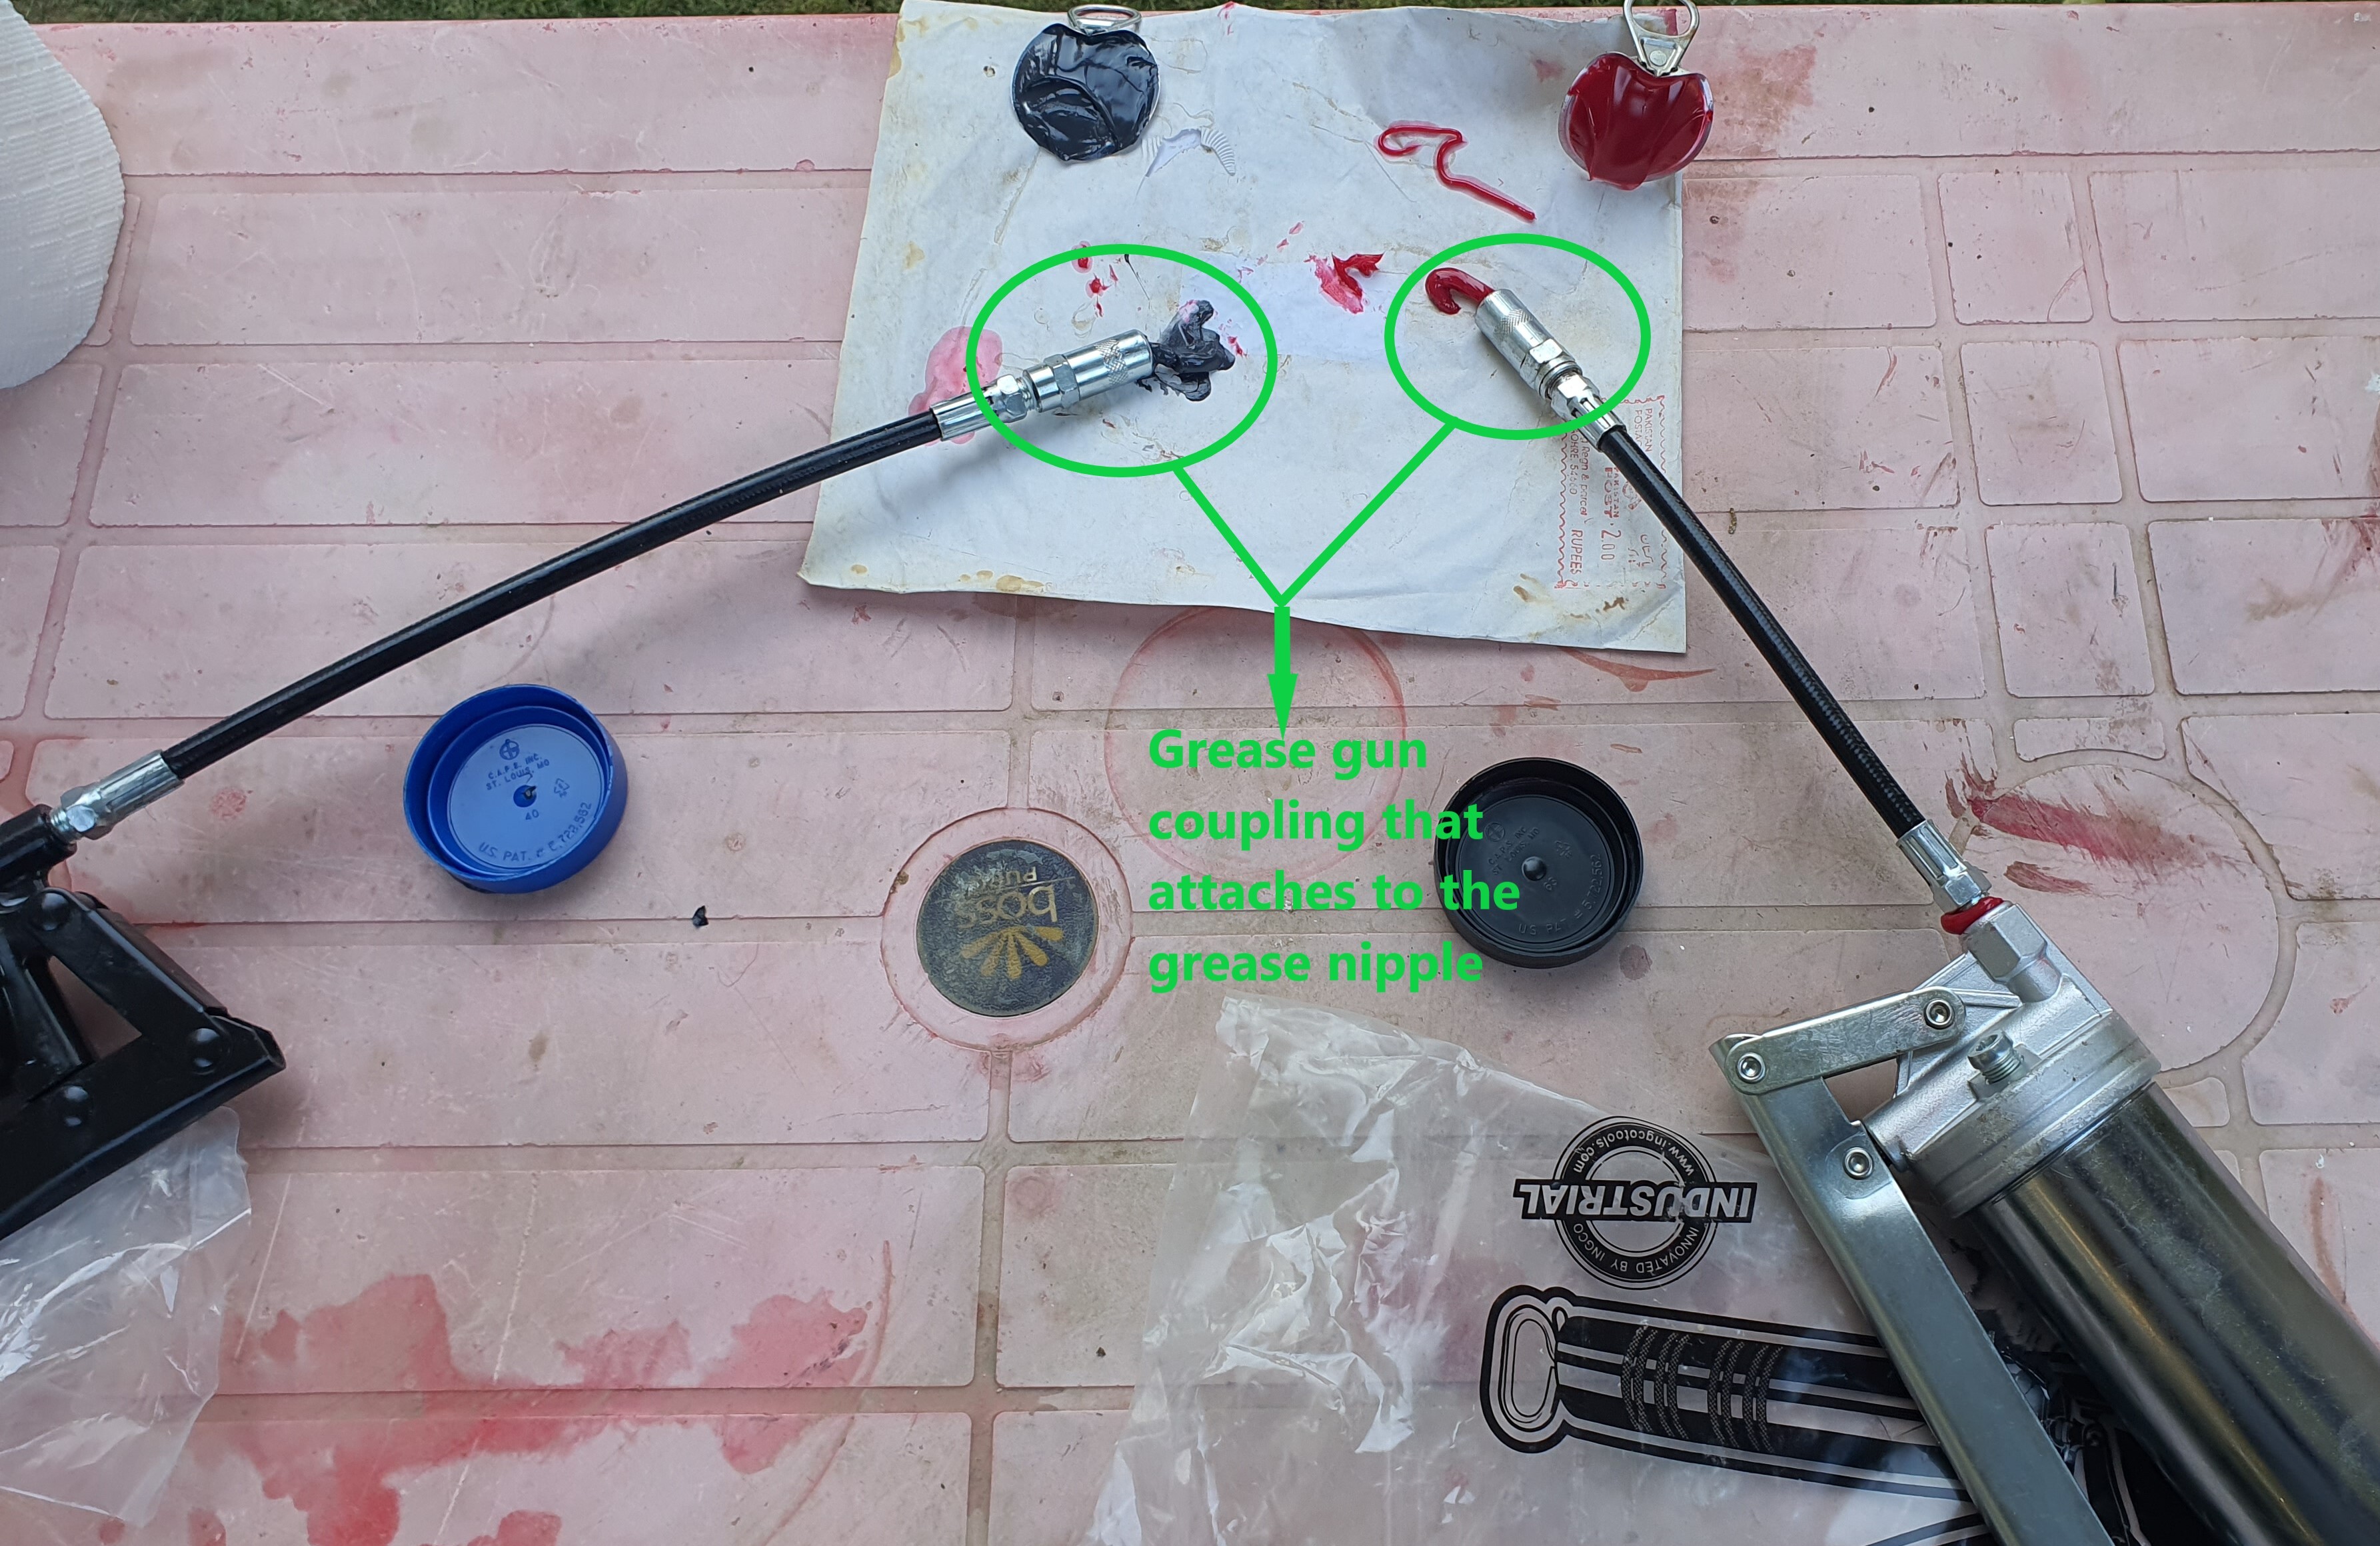
Here is an image of the stuff I used:
As you can see in the image, I used flexible grease couplings with the gun as it provides better maneuverability under the car. I used 400gram grease cartridges and an appropriately sized gun for the task. Once you have loaded the grease guns as per the instructions mentioned, give it a few pumps to make sure there is no air inside:
How much grease to pump in the zerk fittings?
After a detailed search over the internet and skimming through the factory literature, this is what I've concluded:
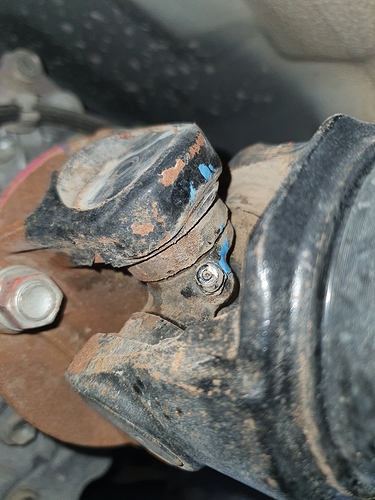
1. Spider joints: Pump till you start seeing new grease oozing from the joints. The goal is to replace all the previous worn-out grease, dirt, and debris inside. Here is a before and after:
Before:
After:
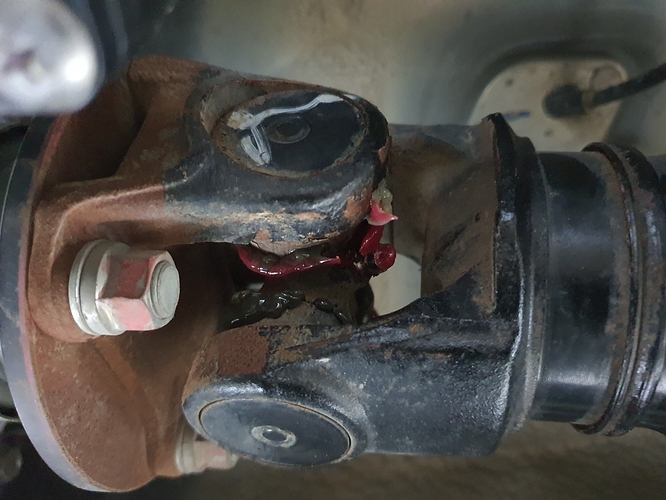
As seen above, the new red grease has completely pushed out the old gray/black grease from the joint. Wipe off the excess grease with a paper towel and we are done.
- Slip-Yoke: There is no clear-cut procedure mentioned in the factory service manual. Some users recommend you either a) pump till you see new grease purge out the slipping end, b) pump till you notice the shaft move, remove the zerk fitting and drive around the car so the excess grease seeps out the open zerk hole, then reattach the zerk fitting or c) only pump two to three times and stop. The rationale behind the last (c) recommendation being the slip-joint expands and contracts and excess grease would limit the contraction of the front propeller shaft and thus, leading to damage of the joint. I played it safe and pumped only 3 times. Would love to hear what the experts have to say on this.
A picture of the slip-yoke zerk:
A few key points to consider:
Wipe off all the grease points with a clean rag or paper towels before attaching the gun.
Make sure to always use the correct grease spec. I used Mobilith SHC 220 for the spider joints and Mobil XHP 462 Moly for the slip yokes. You can see their technical datasheets for the complete specs. Never mix and match different grease.
You can use an MP NLGI 2 Lithium chassis grease on all joints, even in the slip yokes, but NEVER the other way around. A Moly grease should be used where there is sliding/friction motion and not rolling. Moly creates a slick surface so the needle bearings inside the u-joints would "slip" instead of "roll" and would become uneven.
While pumping the grease you will notice a few crackling sounds coming out of the joints, that is completely normal.
When detaching the grease coupling from the zerk fitting, wiggle it around gently in a circular motion instead of pulling it straight. This detaches the coupling easily and also does not damage the zerk fitting.
If you can't see a zerk fitting, or it is hard to reach, rotate the shaft. The front propeller shaft in a part-time 4WD vehicle is free and easily rotatable by hand. The rear one requires you to either lift one rear wheel off the floor and put the car in neutral so the rear propeller shaft can be rotated by hand, or move the vehicle forward or backward a little till the zerk fitting is accessible.
The whole procedure should not take more than 30mins of your time. However, it may take up to an hour if you are doing it for the first time.
Please feel free to add or highlight any important step I may have missed, or anything else I can do to make the procedure even more efficient. Hope this serves as a baseline for many guys doing the job for the first time.